
How to Clean Floor Tiles After Renovation: Step-by-Step Guide for Singapore Homes
Renovation work can completely transform your home, but it often leaves behind a thick layer of dust, cement residue, paint stains, and stubborn grime on your floor tiles. Normal mopping is usually not enough to remove post-renovation dirt, especially in Singapore’s humid environment where stubborn stains easily stick to surfaces.
This guide explains how to clean floor tiles after renovation properly, using safe and effective methods that protect your tiles while restoring their original shine.
Why Floor Tiles Get Extremely Dirty After Renovation
After renovation, floor tiles are exposed to:
Fine construction dust that settles deep into tile pores
Cement residue and grout haze
Paint splashes, adhesive marks, and sealants
Heavy foot traffic from contractors
Unlike everyday dirt, renovation debris bonds strongly to tile surfaces and grout lines, requiring specialized cleaning methods. That’s why basic sweeping or wet mopping often spreads the dust instead of removing it.
Tools & Cleaning Supplies Needed for Post-Renovation Tile Cleaning
Before you start, prepare the right tools to avoid damaging your tiles:
Basic tools
Soft broom or vacuum cleaner
Microfiber mop and cloths
Buckets with clean water for cleaning tiles after a renovation
Cleaning supplies should include baking soda and water for effective stain removal.
Mild floor detergent or tile cleaner
Warm water
For stubborn residue, consider using a mixture of baking soda and water for better results.
Soft scrub brush
Plastic scraper (non-metal)
Safety equipment is essential to prevent damage to the tiles during the cleaning process.
Gloves
Face mask
Avoid harsh acids or abrasive tools, especially on delicate tiles.
Safety Precautions Before Cleaning Floor Tiles
Cleaning after renovation involves fine dust and chemical residue. Always use suitable cleaning supplies to ensure the best results for your tile floor.
Open windows and doors for proper ventilation to aid in the cleaning process.
Wear gloves and a mask to protect your skin and lungs
Test any cleaning solution on a small hidden area first
Never mix different cleaning chemicals together
These precautions help prevent health issues and tile damage.
Preparing the Area Before You Start Cleaning
Proper preparation makes cleaning faster and more effective:
Allow renovation dust to settle for at least 24 hours
Remove loose debris, nails, and leftover materials
Clear furniture, coverings, and tools from the floor
Inspect tiles for cracks or damage before cleaning
Skipping preparation often results in muddy streaks and incomplete cleaning.
Step-by-Step Guide to Cleaning Floor Tiles After Renovation
Step 1 – Dry Cleaning to Remove Dust and Debris
Start by sweeping or vacuuming the entire floor thoroughly. Dry cleaning removes loose dust and prevents it from turning into sludge when water is added.
Vacuuming is recommended as it captures fine dust trapped between tile joints.
Step 2 – Initial Rinse and Surface Cleaning
Use clean water to lightly rinse the floor. This helps loosen remaining dust without spreading it. Change the water frequently to avoid re-depositing dirt.
Avoid soaking the floor at this stage.
Step 3 – Removing Cement, Paint & Adhesive Residue
For stubborn renovation stains:
Use a damp cloth or soft brush
Gently scrape residue with a plastic scraper to avoid damaging the tiles.
Apply mild tile cleaner where necessary
Never use metal tools or strong acids, as these can permanently scratch or etch tiles.
Step 4 – Deep Cleaning the Tile Surface
Mix a mild cleaning solution with warm water and mop the floor section by section. Rinse the mop frequently and replace dirty water often to prevent streaks.
Work in small areas to ensure thorough cleaning of each section of the tile types.
Step 5 – Cleaning Tile Grout Lines Thoroughly
Grout lines trap the most dirt after renovation. Use a soft brush to gently scrub grout with a suitable cleaner, ensuring you don’t damage the tiles. Avoid excessive force, which can weaken grout over time.
Step 6 – Final Rinse, Drying & Inspection
Rinse the entire floor with clean water to remove cleaning residue. Dry the tiles using a microfiber cloth or allow natural air drying. Inspect the floor under good lighting to ensure no stains remain.
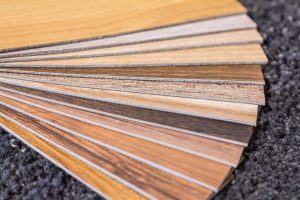
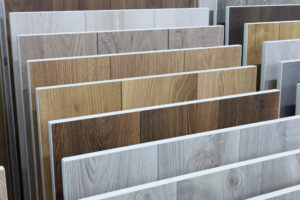
How to Clean Different Types of Floor Tiles After Renovation
Cleaning Porcelain Floor Tiles
Porcelain tiles are durable but still require gentle cleaners. Avoid abrasive pads that can dull the surface over time.
Cleaning Ceramic Floor Tiles
Ceramic tiles are easier to clean but can chip if scrubbed aggressively. Use soft tools and mild solutions only.
Cleaning Natural Stone Tiles (Marble, Granite, Travertine)
Natural stone tiles are sensitive. Avoid acidic or alkaline cleaners, as they can cause permanent damage. Always use stone-safe cleaning products.
Cleaning Homogeneous Tiles
Homogeneous tiles need consistent cleaning to maintain uniform colour. Deep cleaning should be done evenly across the floor.
Cleaning Cement Tiles
Cement tiles are porous and prone to staining. Avoid excessive water and ensure proper drying after cleaning. Sealing may be required after renovation cleaning.
Common Mistakes to Avoid When Cleaning Floor Tiles After Renovation
Using harsh chemicals or acids
Scrubbing tiles too aggressively
Skipping dry cleaning before wet cleaning
Reusing dirty water repeatedly
Ignoring grout lines can lead to stubborn stains that are difficult to remove from tile surfaces.
These mistakes can cause dullness, stains, or long-term tile damage.
How to Maintain Clean Floor Tiles After Post-Renovation Cleaning
Sweep or vacuum daily for the first few weeks
Mop weekly using mild cleaners
Wipe spills immediately
Avoid dragging furniture directly on tiles
Good maintenance prevents renovation dust from resurfacing.
When Should You Hire Professional Post-Renovation Cleaning Services?
Consider professional cleaning if:
Cement residue or grout haze remains after DIY cleaning, often requiring specific cleaning methods for removal.
You have delicate stone or cement tiles
Large renovation areas require deep cleaning
Time and effort become overwhelming
Professional cleaners use industrial equipment and specialised solutions for safer and faster results.
Final Tips for Keeping Floor Tiles Clean After Renovation
Post-renovation tile cleaning requires patience, the right tools, and proper techniques. By following these steps, you can restore your floor tiles safely and maintain their appearance for years to come.
If the dirt proves stubborn or the tiles are delicate, professional post-renovation cleaning is often the most effective solution.
Similar Articles


Contact Us
Got a question? We’re here to help. Drop us an email and we’ll get back to you as soon as we can.