
DIY Vinyl Flooring Installation Guide: Step-by-Step Tutorial for Beginners
Vinyl flooring has become one of the most popular flooring choices for homeowners today. It is affordable, water-resistant, durable, and available in beautiful designs that mimic wood, stone, and tiles. Because of its simple installation systems, many homeowners choose to install vinyl flooring themselves.
If you are planning a DIY project, this step-by-step vinyl flooring installation guide will help you understand the process, tools, and best practices to get a professional-looking finish.
However, if you prefer expert advice, premium materials, or professional installation services, you can always explore flooring solutions from specialists like thelnflooring.com, which offers modern vinyl flooring options and guidance for homeowners.
Before You Begin: Is DIY Vinyl Flooring Right for You?
Installing vinyl flooring yourself can save money, but it also requires patience and preparation. Before starting your project, consider whether your space and skill level are suitable for a DIY installation.
Understanding Vinyl Flooring Types
There are several types of vinyl flooring commonly used in homes:
Luxury Vinyl Planks (LVP)
These planks mimic hardwood flooring and often come with click-lock systems that are beginner-friendly.
Vinyl Tiles (LVT)
These resemble ceramic tiles and may require adhesive installation.
Sheet Vinyl Flooring
This comes in large rolls and usually requires precise cutting and adhesive application.
For beginners, click-lock vinyl planks are usually the easiest option because they do not require glue.
Assessing Your Room
Vinyl flooring works well in many areas such as:
Living rooms
Bedrooms
Kitchens
Bathrooms
Offices
However, rooms with severe moisture problems or uneven subfloors may require professional assessment.
Estimating Materials and Budget
Measure the length and width of your room to calculate the total square footage. It is recommended to purchase around 10% extra material to account for cutting waste and mistakes.
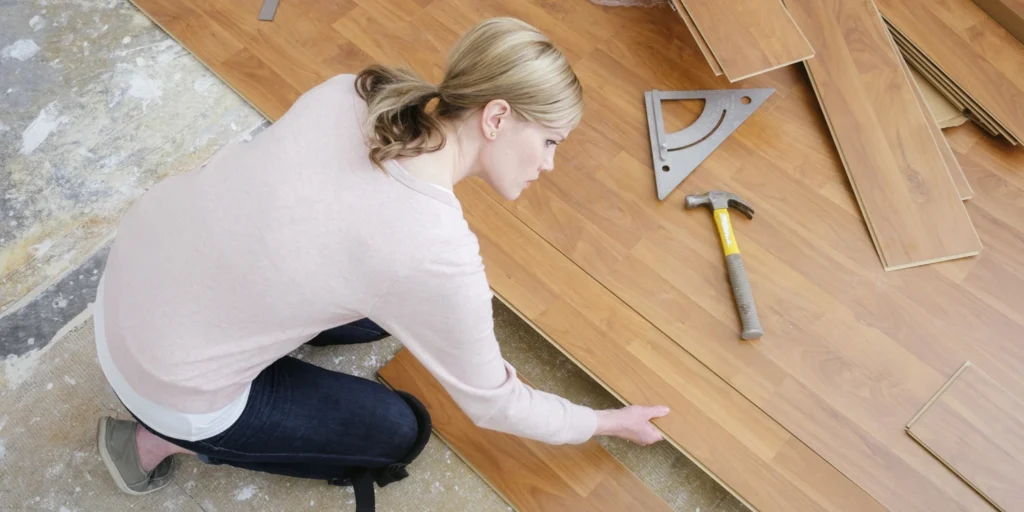
Essential Tools and Materials
Before starting your DIY vinyl flooring installation, gather the following tools.
Basic Tools
Measuring tape
Utility knife
Pencil or marker
Straight edge or ruler
Rubber mallet
Spacers
Level
Optional Tools
Depending on the flooring type, you may also need:
Vinyl floor adhesive
Flooring roller
Jigsaw or saw
Underlayment
Using the correct tools helps ensure cleaner cuts and a more professional finish.
Preparing the Subfloor
Subfloor preparation is the most important step in any flooring installation. Vinyl flooring is flexible, which means imperfections underneath can show through the surface.
Remove Old Flooring
Start by removing any existing flooring such as carpet, laminate, or loose tiles. Ensure the base floor is completely exposed.
Check for Uneven Surfaces
Your subfloor must be:
Clean
Dry
Smooth
Level
If there are bumps, cracks, or holes, use a floor leveling compound to smooth the surface.
Clean the Surface
Dust, wax, or grease can prevent vinyl from sticking properly. Clean the subfloor thoroughly and allow it to dry completely.
Acclimate the Flooring
Before installation, leave the vinyl planks in the room for 24 to 48 hours. This allows the material to adjust to the temperature and humidity of the space.
Step-by-Step Vinyl Flooring Installation
Once the room is prepared, you can begin installing the vinyl flooring.
1. Plan the Layout
Start by determining the direction of the planks. Most installers place planks parallel to the longest wall or toward the main light source in the room.
Dry-lay several rows to check alignment and spacing.
2. Install the First Row
Place spacers between the plank and the wall to allow for expansion.
Install the first row carefully because it will determine how straight the rest of the floor will be.
3. Connect the Planks
For click-lock vinyl flooring:
Angle the plank into the previous plank.
Push down until it locks into place.
Tap gently with a rubber mallet if needed.
For glue-down flooring, apply adhesive evenly and place the plank firmly onto the surface.
4. Cut Planks to Fit
When reaching walls or corners, measure carefully and cut the plank using a utility knife or saw.
A common technique is score and snap:
Score the plank with a knife.
Bend the plank slightly.
Snap along the line.
5. Stagger the Joints
Stagger the plank joints for a more natural appearance and stronger structure.
Avoid lining up seams directly across rows.
Finishing Touches
After the flooring is installed, you can complete the project with finishing details.
Install Trims and Moldings
Add baseboards or transition strips around the edges of the room to cover expansion gaps and improve the overall appearance.
Clean the Floor
Remove dust and debris using a soft broom or vacuum. Avoid excessive water during the first cleaning.
Allow Proper Settling Time
If adhesive was used, allow the flooring to set for 24 hours before placing heavy furniture.
Common DIY Vinyl Flooring Mistakes
Even simple installations can go wrong if important steps are skipped.
Poor Subfloor Preparation
Uneven surfaces can cause bumps or gaps in the flooring.
Incorrect Measurements
Always double-check measurements before cutting planks.
Not Leaving Expansion Gaps
Vinyl flooring expands and contracts with temperature changes, so spacing near walls is necessary.
Skipping Acclimation
Installing flooring immediately after delivery can cause warping or shifting later.
Troubleshooting Vinyl Flooring Problems
Bubbles or Air Pockets
These may occur if adhesive was uneven or the floor was not rolled properly.
Gaps Between Planks
Gently tap planks together using a rubber mallet.
Lifting Edges
This usually indicates moisture or poor adhesive bonding.
When to Hire Professionals
DIY installation works well for many homeowners, but professional installation may be better in some situations:
Large open spaces
Severely uneven subfloors
Complex layouts
Commercial spaces
If you want a guaranteed professional finish, consulting experienced flooring specialists can save time and prevent costly mistakes. Many homeowners explore trusted flooring providers like thelnflooring.com for expert advice, quality materials, and professional vinyl flooring installation services.
Final Thoughts
DIY vinyl flooring installation can be a rewarding home improvement project. With proper planning, the right tools, and careful subfloor preparation, even beginners can achieve a clean and professional-looking floor.
However, if you want premium vinyl flooring options, expert recommendations, or professional installation support, it’s worth exploring trusted flooring resources such as thelnflooring.com, where you can find high-quality flooring solutions for modern homes.
Similar Articles


Contact Us
Got a question? We’re here to help. Drop us an email and we’ll get back to you as soon as we can.