Author name: boss

Wood look vinyl plank flooring samples with natural finishes
Blogs

Durable & Best Vinyl flooring option: What to buy & Avoid ?

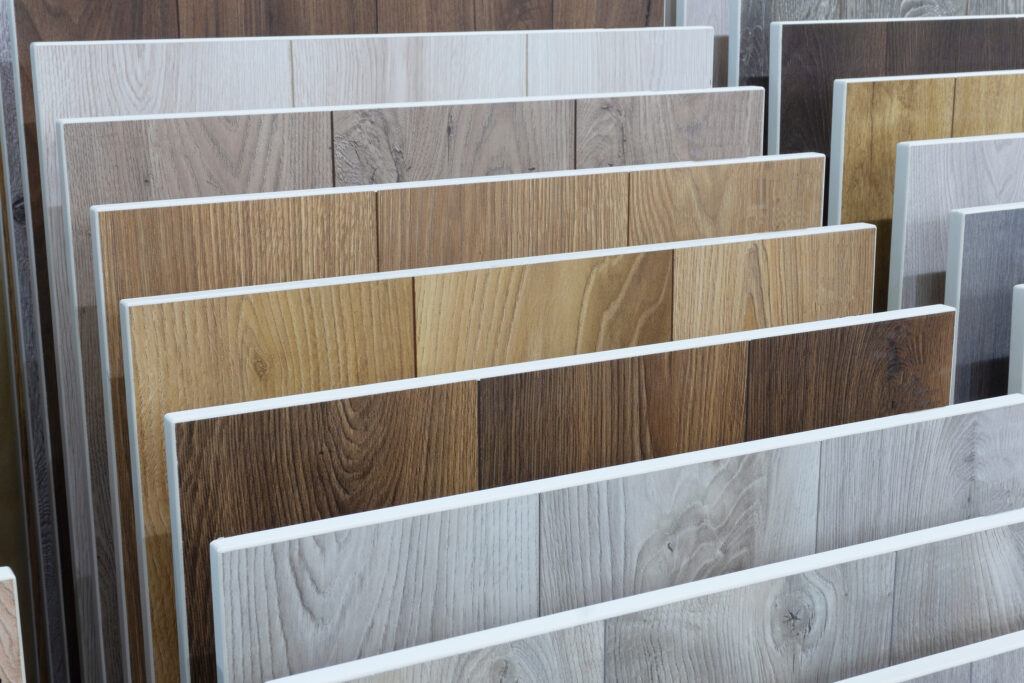
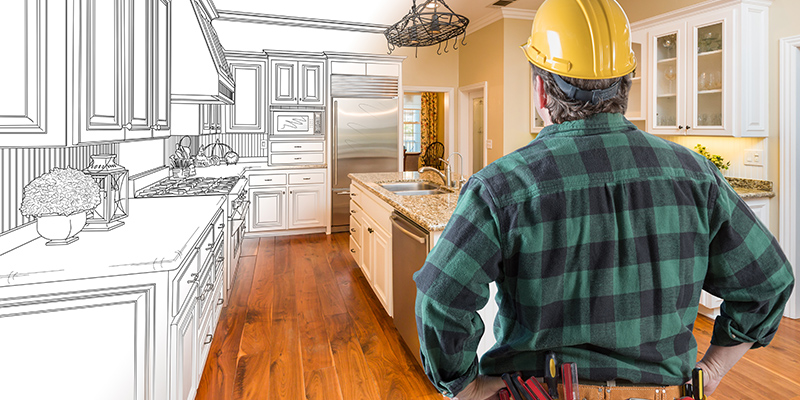
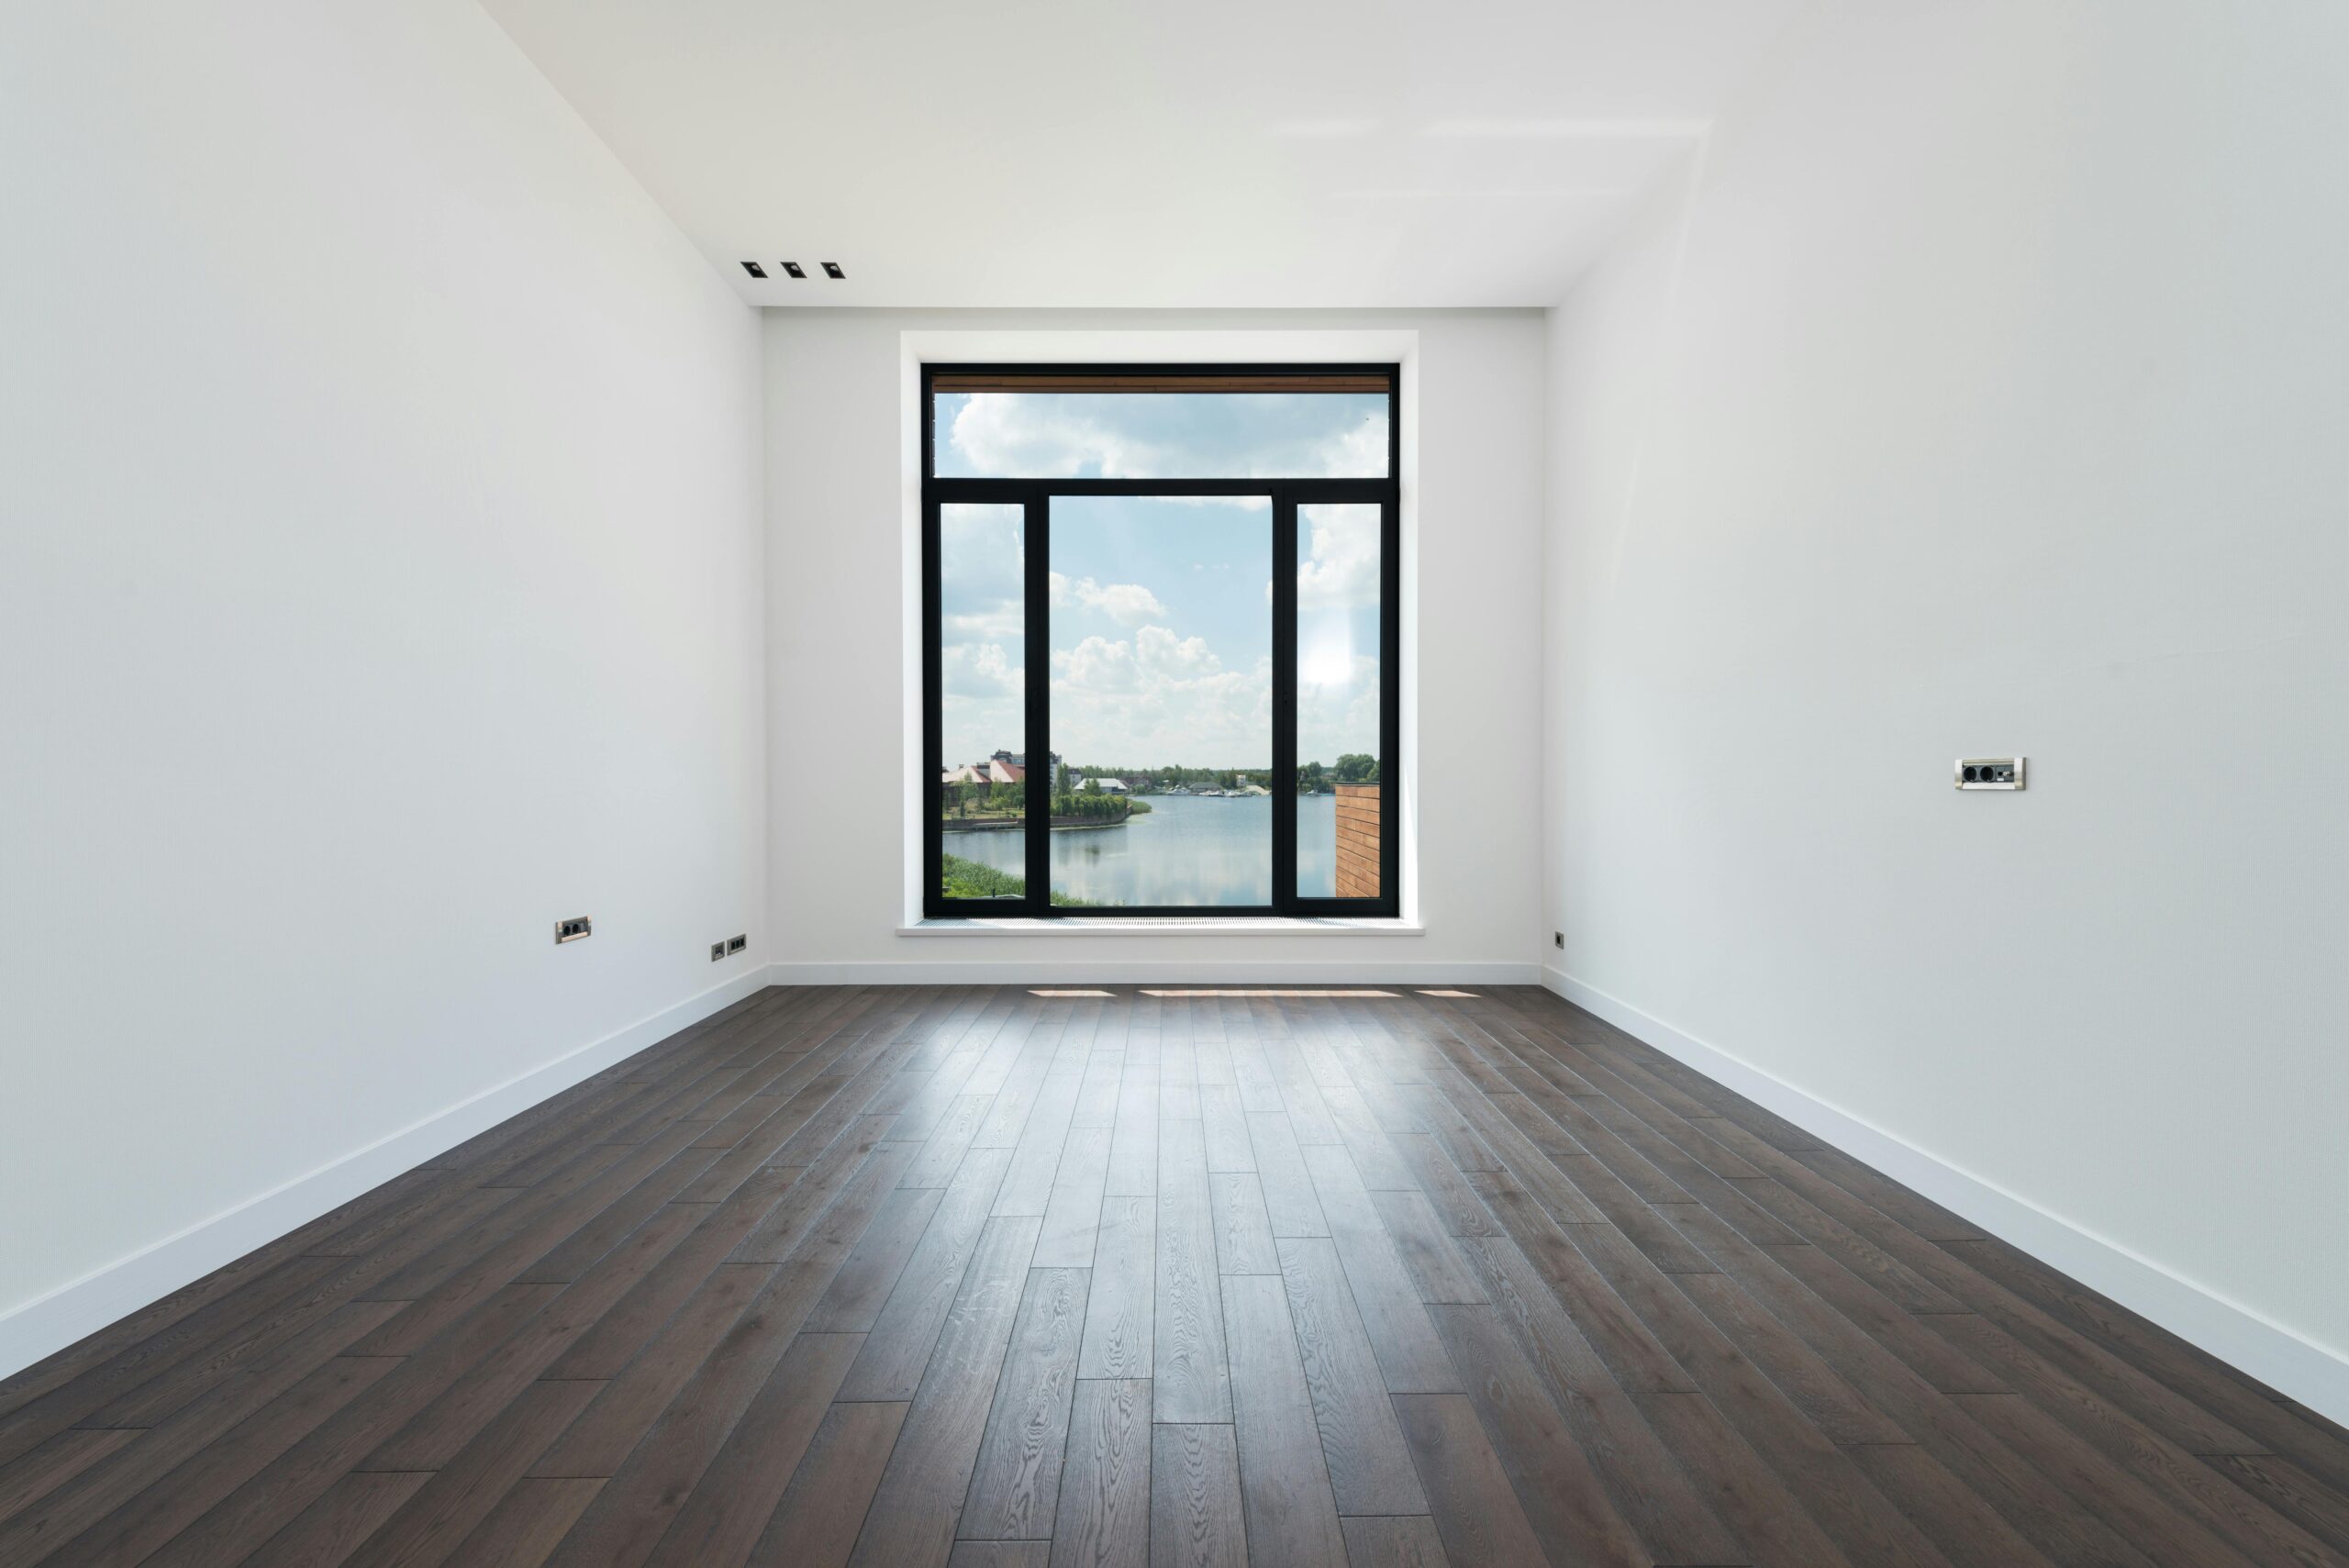
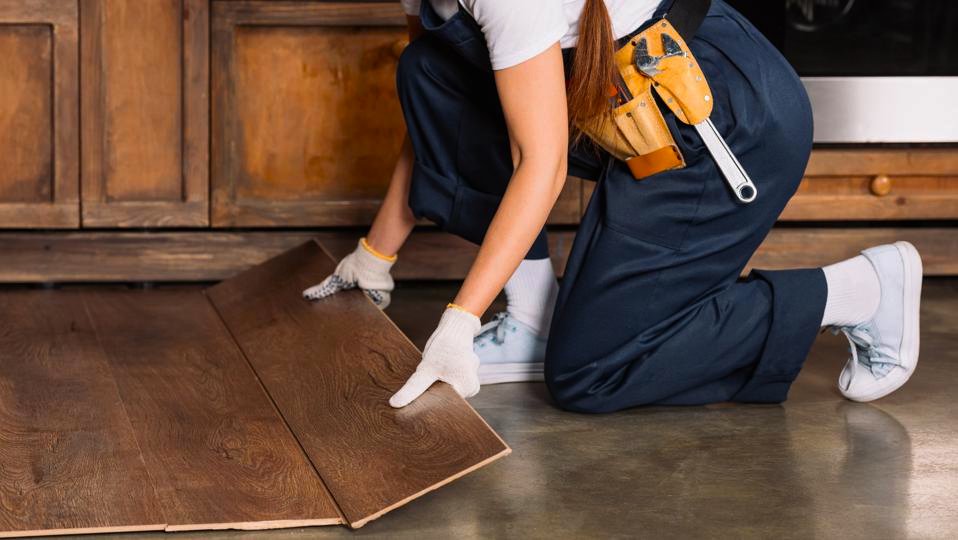
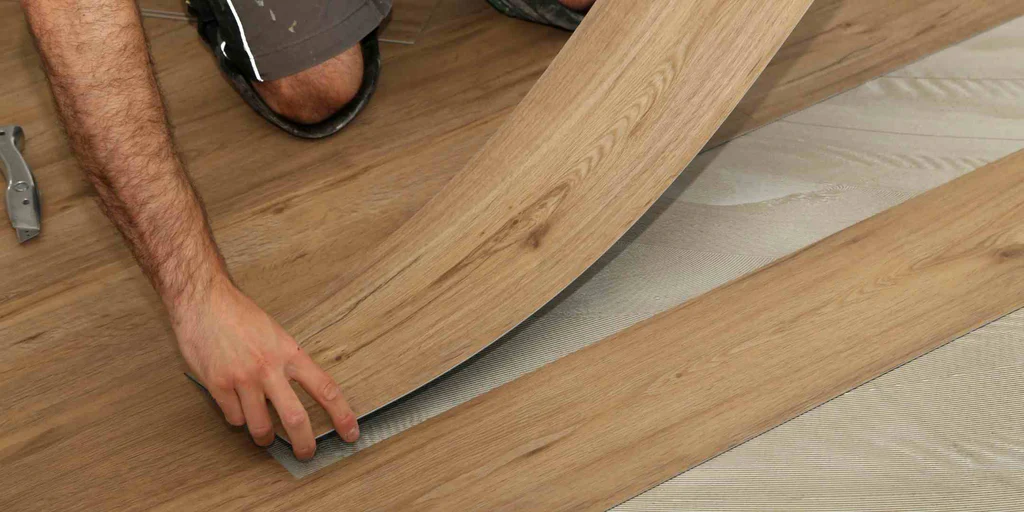
Durable & Best Vinyl Flooring Options in Singapore: What to Buy (and What to Avoid) If you’re searching for the best vinyl flooring in Singapore, “best” shouldn’t mean the prettiest colour or the biggest brand name. In Singapore’s humid weather and compact home layouts, durability comes down to a few technical details: wear layer, core type (SPC/LVT/WPC), locking system, surface coating, and installation quality. This guide breaks it all down in plain English, so you can buy once and enjoy it for years.   What “durable vinyl flooring” really means in Singapore A durable vinyl floor is one that: stays stable in humidity (no warping / gaps), resists scratches from daily use, handles spills and wet mopping, survives moving furniture, kids, pets, and high-traffic corridors, and still looks good after 3–5 years. Many Singapore vinyl guides highlight that you should judge “best” by performance features such as water resistance, core stability, and wear-layer protection—not just marketing.   1) Wear layer: the #1 durability spec to check The wear layer is the clear protective layer on top. Thicker = better protection against scuffs, scratches, and wear. A common benchmark: 0.3mm wear layer: decent for normal households 0.5mm wear layer: recommended for kids/pets/heavier traffic This “0.3mm vs 0.5mm” guidance shows up in Singapore-focused buying advice. Real examples: some Singapore product listings clearly state 0.5mm wear layers on 5mm LVT planks. Rule of thumb: If you want “durable”, aim 0.5mm wear layer for living rooms, corridors, and homes with pets/kids.   2) Core type: SPC vs LVT vs sheet vinyl (which lasts best?) SPC (Stone Plastic/Polymer Composite): “durability-first” If you want something that feels solid and stays stable, SPC is often chosen because it has a rigid core and tends to hold its shape well—useful in humid climates. Best for: living room, dining, hallway, rental units, busy householdsTradeoff: can feel harder underfoot depending on underlay LVT (Luxury Vinyl Tile/Plank): “comfort + looks” LVT is popular because it’s comfortable, realistic-looking, and still durable—especially when paired with a strong wear layer. Many Singapore suppliers describe LVT as a low-maintenance, resilient option with wide design variety. Best for: bedrooms, living areas, homes prioritising comfortTradeoff: performance depends heavily on subfloor prep and product quality Vinyl sheet: “few seams + practical” Sheet vinyl has fewer seams, which can be practical for certain spaces, but it’s usually chosen for specific use cases (budget or wet areas) rather than premium look/feel. Best for: certain wet-prone areas, utility spacesTradeoff: repairs can be less modular than planks/tiles   3) Click-lock vs glue-down: installation method affects lifespan Even the best vinyl can fail with poor installation. Click-lock / floating: faster, cleaner, good for many homes Glue-down: common in commercial/high-traffic applications where maximum bond and stability is needed If your contractor doesn’t prepare the subfloor properly, you risk: hollow spots, lifting edges, gaps, uneven joints. (That’s why durability is not just the product—it’s product + prep + workmanship.)   4) Surface coating: the “bonus durability” most people ignore Some ranges highlight: anti-scratch coatings, stain resistance, antibacterial properties, UV coatings. For example, certain “eco-friendly”/premium vinyl lines mention features like scratch resistance, rigid high-density cores, and additional underlay layers designed for comfort. You don’t need every feature. But for long-term durability, an extra protective coating + 0.5mm wear layer is a strong combo.   5) Safety and indoor air quality: don’t skip this in Singapore homes If you have kids, elderly family members, or you’re sensitive to smells, look for: low VOC claims, reputable third-party testing/certifications where available, slip resistance. Some Singapore vinyl product pages explicitly mention being tested/certified and “safe for seniors, kids, and pets” with certification logos listed. Some brands also position their vinyl as tested to avoid degrading indoor air quality.   Room-by-room: what’s the “best durable vinyl” choice? Living room + hallway (highest traffic) Best pick: SPC or premium LVT with 0.5mm wear layer Why: high traffic = more scuffs, chair movement, daily dust Bedrooms Best pick: LVT/LVP with comfortable underlay; wear layer depends on lifestyleWhy: lower traffic, comfort matters more Kitchen / spill-prone zones Best pick: waterproof vinyl with strong wear layer + good slip resistanceWhy: regular mopping and spills are common in Singapore homes   Price and warranty: how to judge value (not just cheap) A common trap is choosing the cheapest psf rate, then getting hit with: skirting add-ons, furniture moving, door shaving, minimum job charges for small areas. Some local listings openly mention these “other associated costs” and show example warranty terms (installation vs materials). What to compare across quotes: wear layer thickness (0.3 vs 0.5) core type (SPC vs LVT) thickness (comfort + feel) underlay included? what’s covered under workmanship warranty vs material warranty?   Quick buyer checklist: durable vinyl flooring in Singapore If you want the most durable option, look for: 0.5mm wear layer (especially for living rooms/corridors) SPC rigid core (for stability) good locking system + proper expansion gaps low VOC / reputable testing (especially for families) installer who includes subfloor assessment/leveling in scope   Conclusion: “Best” vinyl flooring = the right specs for your lifestyle In Singapore, the safest durable choice for most homeowners is:SPC or premium LVT + 0.5mm wear layer + proper subfloor prep + matte/satin finish. Similar Articles Contact Us Got a question? We’re here to help. Drop us an email and we’ll get back to you as soon as we can.

Blogs

Dark vs Light vinyl flooring: Which looks better ?

Dark vs. Light Vinyl Flooring: Which One Looks Better (and Stays Cleaner) in Real Homes?    Choosing vinyl flooring isn’t just about “what looks nice in the showroom.” The colour you pick changes how big your space feels, how often the floor looks dusty, and whether scratches and hair show up daily. This guide breaks down dark-coloured vs light-coloured vinyl flooring in a practical way—so you can choose based on your lifestyle, lighting, and cleaning habits.   Dark vinyl flooring: the real pros (and the real annoyances) Why homeowners choose dark vinyl Rich, premium look (walnut/espresso/charcoal tones) Creates contrast with light walls and minimalist furniture Can feel cozier and more “grounded”, especially in large bright rooms Dark tones can make scuffs and stains less “in-your-face” compared to very pale floors What dark vinyl tends to reveal Dust and fine particles show faster (you’ll notice “powdery” build-up sooner) Footprints and streaks can be more obvious, especially if the floor has any sheen If you have a pet with light fur, it can stand out more on dark floors Dark flooring can make a small room feel smaller / heavier Best rooms for dark vinyl: bright living rooms, larger spaces with lots of daylight, feature-wall homes, “hotel-style” bedrooms.   Light vinyl flooring: the real pros (and the real annoyances)   Why homeowners choose light vinyl Makes rooms feel bigger and brighter because it reflects light Gives a clean “Scandi / Muji / minimalist” vibe Can help hide dust and pet hair (especially light-coloured hair) better than dark floors Light shades work well if your home has limited natural light (common in some stacks/units) What light vinyl tends to reveal Dark dirt (mud, grime, oily marks) can stand out more on very light floors Stains can become “high contrast” if you go too pale/whitewashed If you have a pet with dark fur, it can be more visible Best rooms for light vinyl: small HDB rooms, darker corridors, bedrooms, homes that want an airy look.   The truth: mid-tone vinyl is often the easiest to live with If you want the floor to look “clean” the longest between mops, the sweet spot is usually mid-tone—not too dark, not too light. A medium oak / warm grey / taupe wood-look tends to: hide dust better than dark floors hide stains better than pale floors look good in most lighting BuildDirect also recommends the “middle of the colour spectrum” approach for hiding everyday dirt best.   Don’t ignore this: sheen + texture matter as much as colour Two floors can be the same colour—but one looks dirty faster because of finish. Pick the right finish High gloss = shows dust, streaks, footprints more Satin / matte = more forgiving day-to-day (BuildDirect specifically notes satin showing less dirt/scuffs vs glossy). Pick the right pattern Multi-tone wood grain and natural variation hide wear better than flat, single-tone designs. Very “clean” uniform planks can show every mark.   Quick decision guide for Singapore homes   Choose darker vinyl if… Your space is large and bright (plenty of daylight) You like bold contrast (dark floor + light walls) You don’t mind vacuuming more often for dust visibility Choose lighter vinyl if… Your space is small or lacks natural light You want the home to feel airy and spacious You have light pet hair and want it less visible Choose mid-tone if… You want the most “forgiving” floor for daily life You have mixed lighting (some rooms bright, some rooms dark) You don’t want to overthink it   Practical tips before you decide (so you don’t regret it) Test samples at home morning + night (lighting changes everything). LX Hausys highlights lighting as a major factor in how light/dark floors behave in a room. Stand where your ceiling light hits the floor—dark floors can show glare/dust depending on light direction. Match against your cabinets and walls (avoid dark-on-dark unless you want a moody look). If you have pets: match your floor tone closer to your pet hair colour (dark hair vs light hair visibility is real).   Conclusion: “Best colour” = the one that fits your lifestyle Dark vinyl can look luxurious and dramatic—but it may show dust faster. Light vinyl can brighten and enlarge a space—but it may show stains more easily. For most busy homes, mid-tone + matte/satin + wood-grain variation is the easiest combo to maintain long-term.   Similar Articles Contact Us Got a question? We’re here to help. Drop us an email and we’ll get back to you as soon as we can.

Blogs

choosing the right contractor in sinagpore

Singapore Flooring Contractor Guide: How to Choose the Right One (Step-by-Step)     Choosing a flooring contractor in Singapore is not just about comparing prices. The wrong contractor can lead to: Uneven floors Hollow sounds Gaps and lifting edges Delays and hidden costs Warranty issues The right contractor ensures: Proper subfloor preparation Professional installation Compliance with HDB or condo rules Long-lasting results This step-by-step guide will show you exactly how to evaluate and select a reliable flooring contractor in Singapore. Step 1: Define Your Flooring Project Clearly Before contacting any contractor, clarify: What type of flooring? (vinyl, SPC, laminate, tiles, engineered wood) Which areas? (living room, bedrooms, kitchen, whole house) Overlay or hacking? Budget range? Timeline requirements? The clearer your scope, the more accurate your quotations will be. Step 2: Verify Credentials (Especially for HDB Homes) If you live in an HDB flat, this is critical. HDB requires homeowners to engage contractors listed in the Directory of Renovation Contractors (DRC) for renovation works. Failure to comply can lead to penalties. You should: Verify HDB DRC listing (for flats) Check ACRA business registration Confirm BCA licensing (if applicable) Ask whether they are familiar with HDB renovation guidelines Condo owners should also check MCST rules regarding: Working hours Noise restrictions Lift protection Debris disposal A legitimate contractor will already know these procedures. Step 3: Assess Experience & Specialisation Not all flooring contractors are equal. Ask: How many years have you been installing flooring? Do you specialise in vinyl/SPC/tiles or general renovation? Can you show similar completed projects? Do you handle installation in-house or outsource? An experienced installer understands: Subfloor leveling Moisture issues Door clearance adjustments Transition strips and finishing details Experience reduces costly mistakes. Step 4: Inspect Portfolio & Past Work Photos alone are not enough. Ask for: Before & after photos Close-up images of joints and skirting Real project references Client testimonials Look at: Straight plank alignment Clean skirting lines Even transitions between rooms No visible gaps Good workmanship shows in details. Step 5: Understand the Scope of Work Many disputes happen because scope is unclear. Your quotation should clearly state: Flooring material type & thickness Wear layer (for vinyl/SPC) Subfloor preparation included or excluded Hacking & disposal cost Skirting supply & installation Door trimming (if required) Project duration Warranty coverage If the quote is vague, expect hidden charges later. Step 6: Compare Quotes the Right Way (Not Just Cheapest) Extremely low quotes are a red flag. Low pricing may mean: No proper leveling Thinner materials Lower wear layer Outsourced labour No after-sales support Instead of choosing cheapest, compare: Material specs Subfloor prep included? Warranty length? Payment terms? Experience level? Cheap now can cost more later. Step 7: Ask About Subfloor Preparation (Very Important in Singapore) Singapore homes often have: Uneven screed Old tile lippage Hollow tiles Moisture issues If the contractor does not inspect the floor condition properly, problems like hollow sound or joint separation can appear later. Ask: Will you check moisture levels? Will leveling compound be used if needed? How do you handle uneven tiles for overlay? Subfloor preparation determines 70% of flooring performance. Step 8: Check Insurance & Warranty Protection Professional contractors should carry: Public liability insurance Workmanship warranty Manufacturer warranty (for materials) Clarify: How long is workmanship covered? What voids the warranty? Who handles defects? This protects your investment. Step 9: Review Payment Terms Be cautious if a contractor demands: Full payment upfront Large cash-only deposits No written agreement Standard practice usually includes: Deposit (30–50%) Balance upon completion Always insist on written confirmation. Step 10: Watch for Red Flags Avoid contractors who: Refuse to provide business details Cannot explain product specifications Avoid site visits before quoting Give verbal-only quotations Pressure you with “today only” discounts Have inconsistent reviews Trust your instincts. Singapore-Specific Considerations 1. HDB Regulations Must follow permitted renovation hours Some works require approval Noise restrictions apply Bathroom tile hacking restrictions (especially for new BTO) 2. Climate & Humidity Singapore’s humidity affects flooring choice. Experienced contractors will advise: Vinyl/SPC for moisture resistance Avoid unsuitable materials in wet zones Proper expansion gaps Final Checklist Before You Decide Before signing: ✓ Verified credentials✓ Clear written quotation✓ Inspected portfolio✓ Understood material specifications✓ Clarified warranty✓ Confirmed timeline✓ Comfortable with communication If all boxes are checked — you’re likely making a safe choice. Conclusion: The Right Contractor Makes All the Difference Flooring installation is not just about the product. It’s about: Preparation Precision Compliance Professionalism Choosing the right flooring contractor in Singapore protects your home, your budget, and your peace of mind. Similar Articles Contact Us Got a question? We’re here to help. Drop us an email and we’ll get back to you as soon as we can.

Blogs

why many home owners switch to vinyl

Why Many Homeowners Switch to Vinyl        Introduction: Tiles are “classic” — but vinyl is winning in real homes If you’re renovating in Singapore, you’ve probably asked this exact question: “Why change to vinyl flooring instead of tiles?” Tiles are durable and familiar, but modern vinyl (LVT/LVP/SPC) has improved a lot—better finishes, more realistic designs, and faster installs with less disruption. The best choice depends on budget, lifestyle, cleaning habits, and where the floor is going (living room vs kitchen vs bathroom). Here are the most practical reasons homeowners switch to vinyl, plus the honest situations where tiles still make more sense.   1) Vinyl is usually cheaper overall (material + labour) One big reason people switch: total cost. In Singapore, Qanvast cites typical material pricing of ~$4–$8/sq ft for vinyl vs ~$5–$35/sq ft for tiles, and installation costs around ~$1–$4/sq ft for vinyl vs ~$4–$6/sq ft for tiles. Even before hacking costs, that gap can be significant—especially for whole-home flooring. 2) Faster installation, less mess, less downtime Tile work is “wet work” and it’s messy: mortar, grouting, cutting, and drying/curing time. Vinyl is generally faster and cleaner to install (especially click systems or well-prepped overlays). Mannington (a flooring manufacturer) highlights vinyl as faster/easier with less installation mess and no wait time to use the floor. Real-life benefit: fewer days of disruption, less dust, and you can move furniture back sooner. 3) No grout lines = easier cleaning This is the day-to-day reason people love vinyl. Tiles themselves are easy to mop, but grout lines trap dirt, darken over time, and need brushing/cleaning. Qanvast specifically points out grout as an extra maintenance point for tiles. Vinyl (especially in plank formats) gives a more continuous look and less “deep cleaning” stress. 4) Warmer, quieter, more comfortable underfoot Tiles feel hard and cold. Vinyl is more “forgiving” underfoot—especially in bedrooms and living rooms. If you’re the type who: walks barefoot at home, has kids crawling, or you work from home and stand a lot, …vinyl usually feels nicer day-to-day. 5) Vinyl can be installed as an overlay (sometimes) to avoid hacking Hacking tiles is loud, messy, and adds disposal cost. Some installations can be done over existing flooring (overlay) if the base is sound and properly prepared. A Singapore flooring article from The Floor Gallery mentions overlay as a way to reduce hacking costs, and also notes a commonly discussed point for new BTOs: avoiding hacking bathroom tiles early to protect waterproofing. Important: overlay is not “always can.” The base must be level, stable, and dry—otherwise you’ll get hollow spots, gaps, or premature failure. 6) Design versatility has caught up (wood-look, stone-look, herringbone) Old-school vinyl looked… old-school. Modern vinyl can convincingly mimic: oak / walnut wood grain concrete / stone herringbone patterns “tile-look” designs without the grout-heavy appearance So you get the style without the tile maintenance. 7) Better impact resistance for everyday accidents Tiles are tough, but they can chip or crack if something heavy drops (pot, dumbbell, tools). Many homeowners prefer vinyl because it’s more resilient to impact in real-life usage—especially in family homes. When tiles are still the better choice Vinyl isn’t “better for everything.” Here’s when tiles often win: 1) High heat + heavy cooking environments Qanvast notes tiles are more heat/moisture resistant, while vinyl can be susceptible to warping under high heat/moisture—especially if not installed properly. If you do intense cooking daily (oil + heat + frequent washing), tiles may be the safer long-term pick for kitchen floors. 2) You want the hardest-wearing surface Porcelain/homogeneous tiles are extremely durable and can outlast many flooring types in high-traffic environments. 3) VOC / indoor air quality concerns Qanvast also flags that tiles generally don’t emit VOCs, while vinyl can contribute due to PVC—though low-VOC options exist. If someone at home is sensitive (asthma/respiratory concerns), this is worth discussing with your contractor and choosing certified low-emission materials. The “best of both” approach many Singapore homes use A practical combo that works well: Living room + bedrooms: vinyl (comfort, quieter, cleaner look) Kitchen + bathrooms: tiles (heat/wet performance) It gives you comfort where you want it, and durability where you need it. Final thoughts: should you switch? Change to vinyl flooring instead of tiles if you want: lower total cost faster renovation with less mess easier cleaning (less grout maintenance) warmer, quieter floors for daily living Choose tiles if: you cook heavily and need heat resistance you want maximum hardness/durability VOC concerns are a priority     If you love minimalist or industrial design, cement screed is a modern option. Pros: Seamless look Contemporary aesthetic Works well in open layouts Cons: Requires sealing Can crack if not properly applied     Engineered Wood Flooring: Natural Warmth     Engineered wood gives you the beauty of real wood with better stability than solid hardwood. Best for: Living rooms Master bedrooms It adds warmth and resale value but requires more care compared to vinyl.     Room-by-Room Guide: HDB Flooring Renovation Ideas Living Room: Make a Stylish First Impression Popular choices: Wood-look vinyl for warmth Large format tiles for modern luxury Engineered wood for premium feel Tip: Light oak tones make small HDB flats feel bigger.   Bedrooms: Comfort & Coziness Best options: Vinyl planks Laminate flooring Warm wood tones enhance relaxation and comfort.   Kitchen: Durable & Easy to Clean Recommended: Porcelain tiles Waterproof vinyl Avoid laminate in kitchens due to moisture exposure.   Bathroom: Safety First Must-have features: Slip-resistant tiles Water resistance Proper waterproofing Choose matte finishes to reduce slipperiness.   Balcony & Service Yard Use: Outdoor-rated tiles Anti-slip finishes Ensure drainage slopes are maintained.   Smart Strategies to Maximise Budget & Style   DIY vs Professional Installation DIY may save money, but improper installation leads to: Uneven surfaces Water damage Shorter lifespan Professional installation ensures proper subfloor preparation.   Strategic Material Combinations Smart idea: Tiles in kitchen & bathroom Vinyl in living & bedrooms This balances cost and practicality.   Long-Term Value Matters Don’t just look at

Blogs

Top vinyl flooring contractors singapore

Top Vinyl Flooring Contractor Singapore: Expert Installation & Reliable Service       Introduction: Why Vinyl Flooring Is Everywhere in Singapore Now If you’re searching “vinyl flooring contractor Singapore”, you’re probably comparing quotes, looking at designs, and wondering who you can trust to do a clean install (no lifting edges, no gaps, no hollow sound). Vinyl flooring has become a top pick for HDBs, condos, and even offices because it’s practical in Singapore’s humidity, looks great, and is usually faster to install than tiles or wood. In this guide, we’ll cover what vinyl flooring is, why it’s popular, and how to choose a contractor that won’t give you problems later. Why Vinyl Flooring Is a Smart Choice for Singapore Homes and Businesses Unrivalled durability for high-traffic areas A good vinyl system has a protective wear layer that helps resist scratches and daily foot traffic—ideal for living rooms, corridors, offices, and rental units. Waterproof and water-resistant properties Vinyl is commonly chosen because it handles spills and humid conditions well—especially useful for homes with kids, pets, or frequent cleaning. Design versatility: wood, stone, herringbone, and modern SPC Today’s vinyl comes in styles that mimic: natural oak / walnut wood grains cement / microcement looks stone and marble looks herringbone layouts You’ll also hear terms like: LVT/LVP (Luxury Vinyl Tile / Plank) – typically more flexible SPC (Stone Polymer/Plastic Composite) – rigid core vinyl that feels more solid underfoot Easy maintenance for busy lifestyles Most vinyl floors only need: regular sweeping/vacuuming damp mopping (not soaking wet) felt pads under furniture Health & safety concerns: VOC, smell, and “is vinyl safe?” Some homeowners worry about smell and indoor air quality. A reputable contractor should be able to explain: what the product certifications are how long to ventilate after installation which options are lower VOC (depending on brand/spec) (If a contractor refuses to share spec sheets, that’s a red flag.) The Foundation of Expertise: What Makes a Top Contractor Stand Out Beyond basic installation: workmanship matters more than the vinyl brand Even “premium” vinyl can fail if installation is rushed. Common issues caused by poor workmanship: lifting edges visible gaps hollow sound uneven feel water seepage into seams Subfloor preparation is everything in Singapore Singapore homes often have older tile bases, patches, or uneven screed. The best contractors will check: flatness (high/low spots) moisture issues cracks and loose tiles door clearance / skirting height Then they’ll advise if you need: self-levelling compound patch repairs proper underlay (when needed) Advanced installation techniques: glue-down vs click system A good contractor will recommend the method based on your space: Glue-down vinyl often preferred for large open areas and commercial spaces reduces movement if installed correctly needs excellent subfloor prep Click (SPC click-lock) faster installation can be great for homes if the base is suitable still needs a reasonably flat subfloor to prevent bouncing and joint stress HDB rules: what homeowners must know before touching floors If you’re in a new BTO, HDB guidance commonly warns against hacking bathroom/toilet tiles within the first 3 years to avoid damaging waterproofing. This is one reason many homeowners explore overlay solutions where appropriate (and where compliant). Also—different floor works may require permits depending on what you’re changing. Don’t rely on guesswork; your contractor should be familiar with HDB requirements. “HDB registered contractor” — what it really means For HDB renovations, HDB has a directory/scheme for renovation contractors. It’s meant to ensure contractors understand HDB rules, but it’s not a guarantee of workmanship quality. Do your own checks (reviews, past work, scope detail, warranty terms). Unwavering Reliability: What a Professional Vinyl Flooring Service Should Include Transparent communication from consultation to completion Expect: site visit or detailed measurements discussion of usage (kids, pets, heavy furniture, office chairs) clear advice on vinyl type and thickness/wear layer design samples in your lighting (day/night) Detailed quotations (avoid hidden costs) A proper quote should state: total area (sqm) material type (LVT/SPC), thickness, wear layer skirting type (if any) subfloor prep included or excluded hacking/disposal (if needed) timeline (start date + duration) warranty scope (material vs workmanship) Timelines and on-site protection Pros will protect: walls and carpentry edges existing tiles (if overlaying) dust control and cleanup daily After-sales support and warranty Ask what happens if: one plank lifts joints open up there’s hollow sound skirting detaches A reliable contractor won’t disappear after collecting payment. Vinyl Flooring Options You’ll Commonly See in Singapore LVT / LVP slightly softer feel comfortable underfoot good for homes where you want a “warmer” step SPC rigid core more solid feel stable option for many residential and light commercial uses popular for click systems Specialised vinyl (commercial-grade) Some vinyl is designed for: offices retail medical spaces high-traffic corridors Your contractor should recommend based on traffic level—not just what looks nice. Residential vs Commercial Vinyl Flooring Installation For homes (HDB/condo/landed) Homeowners usually prioritise: comfort low maintenance design matching fast completion with minimal mess For commercial spaces Businesses often prioritise: durability minimal downtime consistent finish across large areas long-term stability under foot traffic and rolling loads Maintenance: How to Make Vinyl Flooring Last Longer Simple daily care vacuum or soft broom daily/weekly damp mop (avoid flooding) use doormats to reduce grit felt pads under chairs/sofas Preventing scratches and dents lift furniture (don’t drag) use protectors for dining chairs avoid rubber-backed mats if the brand warns against it Expected lifespan Lifespan depends heavily on: wear layer/spec traffic level installation quality maintenance habits How to Choose the Right Vinyl Flooring Contractor in Singapore Here’s a quick checklist you can use: Show you real past jobs (not just catalog photos) Explain subfloor prep clearly (this is where many “cheap quotes” cut corners) Provide product specs/certifications when asked Give a proper written quote with scope + exclusions Clear warranty terms (and what is not covered) Knowledge of HDB requirements for HDB homes No pressure tactics (“today only price”) Conclusion: Get Expert Installation, Not Just “Vinyl Planks” Vinyl flooring can look premium and feel comfortable—but only if the installation is done

Blogs

HDB flooring budget & stylish ideas

HDB Flooring Renovation: Budget-Friendly & Stylish Ideas for Every Room Introduction: Elevating Your HDB Flat with Smart Flooring Choices Flooring is one of the most important elements in any HDB renovation. It sets the tone of your home, affects maintenance needs, and plays a huge role in comfort and durability. Whether you’ve just collected the keys to your BTO or you’re upgrading a resale flat, choosing the right flooring can transform your space completely. At thelnflooring.com, we help Singapore homeowners choose flooring solutions that balance style, budget, and long-term practicality. The Challenge: Balancing Budget, Style, and Functionality in HDB Renovations In Singapore, HDB flats come with: Space constraints Strict renovation guidelines Moisture and humidity challenges Budget considerations The right flooring must be: Durable in humid weather Easy to maintain Suitable for high-traffic areas Within your renovation budget What This Guide Covers In this article, we’ll explore: Popular flooring materials for HDB flats Room-by-room flooring ideas Budget-smart strategies Maintenance tips for long-term durability Understanding Your HDB Flooring Renovation Landscape Navigating HDB Regulations for Flooring Before starting your renovation, keep in mind: Hacking existing tiles requires approval Wet works must follow HDB guidelines Noise restrictions apply Approved contractors must carry out certain works Always check with your contractor before proceeding. Factors Influencing Your HDB Flooring Budget Your cost depends on: Material type Area size Subfloor condition Hacking and disposal fees Skirting and finishing details Budget tip: Overlaying vinyl over existing tiles (if condition allows) can reduce hacking costs. Why the Right Flooring Matters The right flooring improves: Property value Visual cohesion Comfort underfoot Long-term maintenance cost Good flooring is not just design — it’s an investment. Your Budget-Friendly & Stylish Flooring Material Toolkit Luxury Vinyl Tiles (LVT) & Vinyl Flooring: The Versatile All-Rounder Vinyl flooring is one of the most popular HDB flooring renovation ideas in Singapore. Why homeowners love it: Water-resistant Affordable Wide range of wood and stone designs Soft and comfortable underfoot Fast installation Best for: Living rooms Bedrooms Kitchens Vinyl is especially ideal for families who want a wood look without the high maintenance. Laminate Flooring: Affordable Wood Aesthetic Pros: Budget-friendly Scratch-resistant Good for bedrooms and study rooms Cons: Not suitable for wet areas Can swell with water exposure Ideal for: Bedrooms Home office Ceramic & Porcelain Tiles: Robust & Design-Flexible Benefits: Highly durable Water-resistant Suitable for high-traffic areas Wide variety of finishes Best for: Kitchen Bathroom Balcony Homogeneous tiles are commonly approved and suitable for HDB projects. Microcement & Cement Screed: Industrial Chic If you love minimalist or industrial design, cement screed is a modern option. Pros: Seamless look Contemporary aesthetic Works well in open layouts Cons: Requires sealing Can crack if not properly applied Engineered Wood Flooring: Natural Warmth Engineered wood gives you the beauty of real wood with better stability than solid hardwood. Best for: Living rooms Master bedrooms It adds warmth and resale value but requires more care compared to vinyl. Room-by-Room Guide: HDB Flooring Renovation Ideas Living Room: Make a Stylish First Impression Popular choices: Wood-look vinyl for warmth Large format tiles for modern luxury Engineered wood for premium feel Tip: Light oak tones make small HDB flats feel bigger. Bedrooms: Comfort & Coziness Best options: Vinyl planks Laminate flooring Warm wood tones enhance relaxation and comfort. Kitchen: Durable & Easy to Clean Recommended: Porcelain tiles Waterproof vinyl Avoid laminate in kitchens due to moisture exposure. Bathroom: Safety First Must-have features: Slip-resistant tiles Water resistance Proper waterproofing Choose matte finishes to reduce slipperiness. Balcony & Service Yard Use: Outdoor-rated tiles Anti-slip finishes Ensure drainage slopes are maintained. Smart Strategies to Maximise Budget & Style DIY vs Professional Installation DIY may save money, but improper installation leads to: Uneven surfaces Water damage Shorter lifespan Professional installation ensures proper subfloor preparation. Strategic Material Combinations Smart idea: Tiles in kitchen & bathroom Vinyl in living & bedrooms This balances cost and practicality. Long-Term Value Matters Don’t just look at installation price. Consider: Maintenance cost Replacement cost Lifespan Cheaper now may cost more later. Maintenance & Longevity Daily Care Tips Vinyl: Sweep daily Avoid harsh chemicals Tiles: Clean grout regularly Laminate: Avoid excess water Common HDB Flooring Issues Hollow tiles Cracked grout Vinyl lifting Water seepage Early repair prevents costly replacement. Conclusion: Your Dream HDB Floor Is Within Reach HDB flooring renovation doesn’t have to be expensive to look amazing. Whether you choose: Vinyl for practicality Tiles for durability Laminate for budget Engineered wood for elegance The key is matching your lifestyle, budget, and design vision. At thelnflooring.com, we specialise in helping Singapore homeowners choose the best flooring solutions for their HDB flats. If you’re planning your HDB flooring renovation, contact us today for professional advice and a tailored quotation. Your perfect floor starts with the right decision. Similar Articles Contact Us Got a question? We’re here to help. Drop us an email and we’ll get back to you as soon as we can.

Top view of various painting tools in a bucket on a wooden floor.
Blogs

DIY vinyl flooring

DIY Vinyl Flooring: The Ultimate Step-by-Step Installation Guide Are you looking to upgrade your floors with minimal effort and cost? DIY vinyl flooring is an excellent choice for homeowners seeking an affordable, durable, and stylish solution. Whether you’re tackling the job yourself for the first time or looking to improve your skills, this comprehensive guide will walk you through everything you need to know to successfully install vinyl flooring in your home. Introduction: Unlock Your Home’s Potential with DIY Vinyl Flooring Vinyl flooring is low-maintenance, easy to install, and incredibly versatile, making it a popular choice for homeowners. In this guide, we’ll show you the best DIY vinyl flooring options and provide you with all the steps you need to install them. Why DIY Vinyl Flooring? Benefits and the Ultimate Guide’s Promise Opting for DIY vinyl flooring allows you to save on installation costs, giving you the freedom to customize your home with minimal disruption. From peel-and-stick tiles to luxury vinyl planks, you’ll find options that fit your style and budget. What You’ll Learn: A Roadmap to a Successful DIY Project By the end of this guide, you’ll understand how to choose the right vinyl flooring, prepare your space, install the flooring, and maintain your new floors for long-lasting results.   Understanding Your Vinyl Flooring Options: Choosing the Right Material Exploring Vinyl Material Types There are two main types of vinyl flooring you can choose from: Peel-and-Stick Tiles: Affordable, easy to install, and ideal for DIYers. Luxury Vinyl Planks (LVP): Offers a high-end look and better durability, perfect for a more refined finish. Key Features to Consider: Durability, Wear Layers, and Aesthetics Durability: Choose thicker wear layers for high-traffic areas. Aesthetics: Vinyl comes in a variety of colors and patterns, mimicking wood, stone, or abstract designs. Installation Type: Peel-and-stick is the easiest, while click-lock planks provide a floating floor option that doesn’t require adhesive. Essential Tools and Materials Checklist Before starting your DIY flooring project, gather these essential tools and materials: Tools for Preparation Floor scraper Sandpaper and vacuum Measuring tape and straightedge Utility knife and scissors Materials You’ll Need Vinyl flooring (tiles or planks) Adhesive (if not using peel-and-stick) Primer and floor patch compound   Critical Pre-Installation Steps for a Flawless Finish   Preparing Your Space: Clear Out Furniture and Obstacles Ensure the room is completely cleared of furniture and other items. This makes the installation process smoother and more efficient. Subfloor Preparation: The Foundation of Durability Check the subfloor for cleanliness and levelness. Any cracks or bumps should be fixed before installation to ensure that the vinyl adheres properly. Acclimating Your Vinyl Flooring: The Importance of Temperature and Humidity Allow your vinyl flooring to acclimate in the room for at least 48 hours before installation. This helps prevent warping after installation. Accurate Measuring and Layout Planning Careful measuring ensures you purchase the correct amount of vinyl flooring and avoid wasting materials. Measure the room’s length and width, and account for waste and mistakes.   Step-by-Step DIY Vinyl Flooring Installation Guide General Installation Principles for All Vinyl Types Start with clean subfloor: Make sure the floor is clean, dry, and smooth. Lay a small section first: Begin installing vinyl in one corner of the room to maintain control and ensure alignment. Work from left to right: This helps you stay organized and minimizes errors. Installing Peel-and-Stick Vinyl Tiles/Planks Peel off the backing paper and press each tile directly onto the floor. Start from the corner, working your way out to avoid gaps. Press each tile firmly into place to ensure adhesion. Installing Click-Lock (Floating Method) Vinyl Planks (LVT/LVP, SPC) Align the planks edge-to-edge and click them into place. No glue is needed for this method. Make sure to leave a small expansion gap along the edges of the room to allow for movement. Cutting Techniques for Tricky Spots   Basic Straight Cuts with a Utility Knife and Straightedge Use a utility knife for clean, straight cuts along the vinyl planks or tiles. Measure twice, cut once to ensure accuracy. Making Irregular Cuts: Around Door Frames and Fixtures Use scissors or a jigsaw for irregular cuts, especially around door frames, pipes, or other fixtures. Notching and Scribing for Perfect Fits For tricky corners or obstacles, use a scribe tool to mark and cut the vinyl precisely to fit. Advanced Techniques: Cutting Around Vents and Curved Obstacles For complex areas, such as vents or curved walls, you’ll need to make custom cuts with a jigsaw or coping saw.   Finishing Touches and Post-Installation Care   Installing Baseboards and Quarter-Round Trim To complete the look, install baseboards or quarter-round trim around the edges of your vinyl flooring to cover the expansion gap. Initial Cleanup: Removing Debris and Adhesive Residue After installation, clean the floor of any adhesive residue or debris using a damp cloth and vinyl-safe cleaner. When Can You Walk on Your New Floor? Curing Times Allow the floor to settle for at least 24 hours before walking on it to ensure proper adhesion.   Maintaining Your New DIY Vinyl Floor: Tips for Longevity Regular Cleaning: Using a Microfiber Mop and Approved Cleaners Keep your vinyl floors clean by using a microfiber mop and a gentle, vinyl-safe cleaner. Avoid harsh chemicals that could damage the surface. Protecting Your Floor: Furniture Pads and Mats Use furniture pads and area rugs to prevent scratches and dents from heavy furniture. Addressing Spills and Stains Promptly Clean up spills as soon as they happen to prevent stains and damage to your vinyl flooring. Repairing Minor Damage: Scratches and Dents Small scratches can be fixed with vinyl repair kits, while dents can be flattened using heat and weight.   Troubleshooting Common DIY Vinyl Flooring Issues Uneven Seams or Gaps: Causes and Solutions If seams are uneven or gaps appear, it may be due to improper subfloor preparation. Ensure the floor is smooth and level before installation. Adhesion Problems (for Peel-and-Stick): What to Do When Tiles Lift If tiles lift, it could be due to poor

building, sky, blue, singapore, blue sky, nature, housing
Blogs

BTO reno tips

Expert BTO Renovation Tips: Save Money & Maximize Your Space Transforming your BTO flat into your dream home can be exciting, but without proper planning, it can also become overwhelming. Fortunately, with the right strategies, you can save money, maximize space, and create a functional, beautiful home. Introduction: Transforming Your BTO – Smart Strategies for Cost & Comfort Moving into a BTO flat is an exciting milestone, but it also brings challenges, especially when it comes to renovating. As a first-time homeowner, you’ll want to get the best value for your budget while ensuring your space is functional and comfortable. Welcome to Your New BTO: Opportunities and Challenges BTO flats are a blank canvas, offering the chance to design a home that fits your personality and needs. But with the excitement comes the reality of navigating HDB regulations, managing renovation costs, and making smart design choices. Why Expert Advice Matters for BTO Renovations Whether it’s space planning, choosing materials, or working with contractors, expert advice ensures you avoid costly mistakes and make the most out of your renovation budget. Proper planning can help you avoid delays, streamline the process, and achieve the look and feel you desire. Phase 1: Foundational Planning for BTO Success (Before Renovation Starts) Setting Your Strategic Budget: More Than Just Numbers Start by establishing a realistic renovation budget. Prioritize essential areas like the kitchen and bathrooms. Be sure to include a buffer for unforeseen costs, which are common during renovation projects. A clear budget will guide you through your choices and help you stay on track. Navigating HDB Regulations & Permits: Avoid Costly Mistakes Familiarize yourself with HDB renovation regulations early on. For example, certain renovations, like hacking walls or installing new plumbing, require approval from HDB. Engaging a licensed contractor who understands these rules will save you from costly fines or delays. The Critical Pre-Renovation Steps Planning ahead: Begin your planning at least 3 months before your BTO flat’s key collection date. This gives you ample time to finalize designs, secure materials, and book contractors. Choosing your renovation partner: Whether you opt for an Interior Designer (ID) or a design-and-build contractor, ensure they’re experienced in BTO renovations and can provide clear communication and reliable timelines. Phase 2: Strategic Design & Layout for Maximizing Space Optimizing Your Floor Plan: The Blueprint for Space Before focusing on aesthetics, prioritize functionality and flow. Plan the layout to ensure that every room serves its purpose. Consider traffic flow, storage solutions, and placement of electrical outlets and lighting. Intelligent Storage Solutions: Reclaiming Every Inch Maximize your space by using multi-functional furniture and built-in storage. For example, a platform bed with storage underneath or custom cabinetry that fits your exact needs can help save space and reduce clutter. The Power of Light & Illusion Light plays a huge role in how a room feels. Use natural light where possible, and consider light-colored walls and mirrored surfaces to create the illusion of more space. Smart lighting can also highlight focal points and add ambiance to your home. Material & Colour Psychology for Perceived Space Choose materials and colors that enhance your home’s flow. Neutral tones and light finishes make a space feel larger, while darker tones can add coziness to areas like bedrooms. Be mindful of the materials you choose—durability and ease of maintenance should guide your selections. Phase 3: Practical Application – Maximizing & Saving in Key Areas Kitchen Renovation: The Heart of Your BTO The kitchen is a focal point in any home. Ensure it’s functional and efficient by optimizing storage and workspaces. Consider modular kitchen designs or smart storage solutions like pull-out racks and lazy Susans for easy access to items. Living & Dining Room: Versatility and Flow Create a versatile living and dining area that can accommodate different activities. Opt for open shelving or modular furniture to maximize the space while maintaining flow between the living and dining rooms. Bedrooms & Wardrobes: Personal Sanctuaries In your bedroom, make the most of the limited space with built-in wardrobes and space-saving furniture. Wall-mounted storage can free up floor space, and using vertical storage can maximize your closet area. Bathroom Renovation: Functionality & Maintenance When renovating bathrooms, focus on functionality. Use wall-mounted fixtures and smart storage solutions like shelves or mirrored cabinets. Consider water-saving fixtures and choose tiles that are both aesthetically pleasing and easy to maintain. Phase 4: Expert Cost-Saving Strategies (Beyond the Basics) Smart Material Selection: Balancing Cost, Durability & Aesthetics Choose cost-effective yet durable materials. For example, opt for vinyl flooring instead of expensive tiles, or consider laminate for countertops. Always balance aesthetics with practicality to ensure your choices stand the test of time. Negotiating with Contractors & Avoiding Hidden Costs Don’t be afraid to negotiate pricing with contractors. Always get quotes from multiple contractors and ensure everything is included in the price—hidden costs can add up quickly. Additionally, always ensure your contractors are licensed to avoid legal troubles. Strategic DIY vs. Professional Services For some tasks, like painting or assembling furniture, you can save money by doing it yourself. However, for complex projects like plumbing or electrical work, it’s best to hire professionals. Prioritize professional services for tasks that require expertise. Post-Renovation Savings & Maintenance Once your renovation is complete, ensure that you keep up with regular maintenance to preserve your home’s beauty and functionality. Regular cleaning and small fixes can prevent major repairs down the road. Conclusion: Your Expertly Transformed BTO Home Recap: Key Takeaways for Saving Money & Maximizing Space Renovating your BTO flat is an exciting journey that can lead to a home that fits your needs and style. With careful planning, strategic design choices, and the right budget, you can create a space that’s both functional and beautiful. Enjoying Your Personalized & Efficient BTO Flat By following these expert renovation tips, you’ll be able to maximize your BTO space, save money, and create a home that reflects your personality and lifestyle. Similar Articles Contact Us Got a question? We’re here to help.

Blogs

DIY reno ideas

Genius DIY Home Renovation Ideas for Every Budget & Skill Level Are you looking to refresh your home without the hefty price tag of hiring professionals? Whether you’re new to DIY or a seasoned pro, there’s no shortage of affordable, fun, and impactful projects you can tackle to upgrade your living space. At TheLN Flooring, we believe in making home improvements simple and accessible for everyone. Here’s your ultimate guide to DIY home renovation ideas for every budget and skill level. Why DIY Home Renovation? Home renovations don’t always require a contractor. In fact, tackling some of the projects yourself can give your home a personal touch and save you money. DIY renovations also offer numerous benefits: Personal Satisfaction: There’s nothing like the pride of knowing you made the changes yourself. Customization: Tailor your projects to fit your style and needs. Budget-Friendly: Save on labor costs while still making a significant impact. DIY Home Renovation: Where to Start Before jumping into your DIY project, it’s important to plan. Consider your budget, the skills needed for each task, and the tools required. Here’s how you can get started: 1. Plan Your Renovation Goals Clearly define what you want to achieve. Are you looking to freshen up the look of your living room, or do you want a full kitchen overhaul? Make a list and prioritize. 2. Realistic Budgeting Home renovations can be done without breaking the bank. Decide on a budget for each project and stick to it. Consider saving on expensive materials by shopping sales or using eco-friendly options. 3. Shop Smart Look for bargains at local stores and online. Many renovation projects can be done with affordable tools and materials—don’t underestimate the power of a fresh coat of paint or swapping hardware in the kitchen or bathroom! Top DIY Home Renovation Ideas 1. Kitchen Refresh: A Heartfelt Transformation The kitchen is the heart of the home, and even small changes can have a big impact. Paint Cabinets: Refreshing your kitchen cabinets with a new coat of paint can make them look brand new. Choose a neutral color like white, grey, or even a soft pastel for a clean, modern look. Backsplash Update: Adding or replacing a backsplash can change the entire look of the room. Try peel-and-stick tiles for a quick, budget-friendly upgrade. Install New Handles: Swap out old cabinet handles for sleek, modern ones to instantly update the space. 2. Bathroom Overhaul: Create a Spa Experience Bathrooms are small spaces, but with the right touches, they can feel luxurious. Re-Grout & Re-Tile: Over time, bathroom tiles can get dingy. Re-grouting your tiles or even painting old bathroom tiles can rejuvenate the look without replacing them. Upgrade Hardware: Swap out dated faucets, showerheads, and cabinet pulls for modern fixtures. This simple change makes a big difference. Add Shelving: Use floating shelves or baskets for storage to keep your bathroom tidy and functional. 3. Living Room & Bedroom Updates: Comfort Meets Style Feature Walls: Adding a feature wall with paint or wallpaper can completely change the room’s vibe. Rearrange Furniture: Moving around your furniture can give the space a whole new feel without spending a penny. Textiles: Updating curtains, throw pillows, or rugs can bring a fresh pop of color and texture to your room. 4. Maximize Outdoor Spaces: Create a Welcoming Curb Appeal Your front and backyard are just as important as the interior. Some simple upgrades can make a lasting impression: Paint the Front Door: A fresh coat of bold, inviting color can instantly elevate the appearance of your home. Landscaping: Simple landscaping like planting flowers, adding shrubs, or even creating a small garden can improve curb appeal. Lighting: Install string lights or garden lights to add ambiance and make your home feel more welcoming. Tools You’ll Need for DIY Success Regardless of your project, having the right tools is essential for success. Here’s what you’ll need: Basic Tools: Hammer, drill, screwdriver set, measuring tape. Painting Supplies: Brushes, rollers, painter’s tape, drop cloths. Cutting Tools: Utility knife, saw (for more advanced projects). Cleaning Supplies: Cleaners, sponges, gloves. Safety First Safety is crucial when tackling DIY projects. Always wear protective gear, including goggles and gloves, especially when working with paint or power tools. If a project feels beyond your expertise, don’t hesitate to call in a professional. Final Thoughts: DIY Home Renovation Made Easy DIY home renovations can be both rewarding and affordable. With the right planning and smart choices, you can completely transform your living space without the heavy cost of hiring contractors. Start small, budget wisely, and enjoy the process! For more DIY tips or if you’re looking to upgrade your flooring, check out TheLN Flooring for high-quality, budget-friendly flooring solutions that make your home shine. Similar Articles Contact Us Got a question? We’re here to help. Drop us an email and we’ll get back to you as soon as we can.

Blogs

Vinyl flooring colour guide

The Ultimate Vinyl Flooring Colour Guide: Choose Shades for Every Room When it comes to choosing vinyl flooring, the right color can set the tone for an entire room. Vinyl floors are not only practical, but they can also play a significant role in shaping the ambiance, mood, and style of your home. This comprehensive guide will walk you through the process of selecting the perfect vinyl flooring color for every room in your house. Introduction: Setting the Tone with Your Floor Vinyl flooring is often overlooked when it comes to interior design, but the right color can make a massive difference in how a room feels and functions. Your floor is the foundation of any room, influencing everything from furniture choices to the overall aesthetic. It’s important to select a color that complements your home’s style and enhances the space’s atmosphere. The Unsung Hero: How Your Floor Shapes Your Space Flooring is more than just something you walk on; it’s a crucial design element. It impacts how we experience a room, playing a major role in creating the mood, feel, and functionality of the space. By choosing the right vinyl flooring color, you can completely transform a room, whether it’s a cozy bedroom or a busy kitchen. Beyond Utility: The Power of Vinyl Flooring Colour in Interior Design While vinyl is a durable and low-maintenance choice, its color can be equally important for achieving your desired look. Vinyl flooring comes in a wide range of colors and styles, allowing you to make a statement or keep things understated. The right vinyl color enhances your room’s aesthetic, tying everything together seamlessly. What You’ll Discover: A Practical Guide to Shades for Every Room In this guide, we’ll explore the many factors that should influence your choice of vinyl flooring color. Whether you want to open up a small space or create a cozy environment, we’ll show you how to choose the perfect shade for every room in your home. Decoding Vinyl: Types, Looks, and Colour Potential Before diving into specific colors, it’s essential to understand the types of vinyl flooring available. Vinyl flooring comes in various forms, from traditional vinyl sheets to more modern luxury vinyl tiles (LVT) and SPC vinyl click flooring. Each type offers different textures, patterns, and color options. Understanding Vinyl Flooring: A Brief Overview for Colour Selection Vinyl flooring is an incredibly versatile material, allowing you to achieve a range of looks, from rustic wood to sleek stone. When choosing a color, it’s essential to consider how the texture and finish of the vinyl will affect its appearance in your room. The right texture can enhance the color, creating a more authentic or stylish look. The Visual Variety: Wood Effect, Tile Effect, and Abstract Patterns Vinyl floors come in many visual styles. Wood-effect vinyl offers the warmth and charm of hardwood floors, while tile-effect vinyl mimics the elegance of ceramic or stone tiles. If you’re looking for something more unique, vinyl flooring also comes in abstract patterns, offering a modern, creative aesthetic. How Wear Layer and Surface Treatments Influence Colour Perception The wear layer of vinyl flooring not only affects its durability but also its color longevity. Some finishes and treatments may darken or lighten over time, so it’s essential to consider how the flooring will look after years of use. A high-quality wear layer ensures that your floor’s color stays vibrant and beautiful. Exploring Different Forms: Luxury Vinyl Tiles (LVT) and SPC Vinyl Click Flooring LVT and SPC vinyl offer two different installation and design options. LVT (Luxury Vinyl Tile) is available in a variety of colors and patterns and can mimic real wood or stone. SPC (Stone Plastic Composite) vinyl, on the other hand, is known for its strength, stability, and ease of installation, making it an excellent choice for DIYers. The Psychology of Colour: How Vinyl Shades Influence Mood and Perception The color of your vinyl flooring can significantly impact the mood and ambiance of your space. Different shades evoke different emotions, and it’s important to choose wisely based on the feeling you want to create in your home. Warm vs. Cool Tones: Creating Inviting or Serene Spaces Warm tones like beige, tan, and golden browns create cozy, welcoming environments. These colors are perfect for living rooms, dining rooms, and bedrooms where comfort is key. On the other hand, cool tones like gray, blue, and white offer calm, serene spaces and work well in bathrooms or modern minimalist rooms. Light vs. Dark Hues: Manipulating Room Size and Ambiance Lighter colors can make smaller rooms feel more open and spacious, while darker hues can create a sense of intimacy and warmth. For larger rooms, dark colors like deep browns or rich grays can add a sense of coziness, while light tones like pale wood or soft beige can help brighten up a smaller space. Understanding Colour Psychology for Different Emotional Responses Colors evoke specific emotional responses. For example, light grays and whites often create a fresh, clean atmosphere, while bold tones like red or dark blue can add drama and sophistication to a space. Consider how you want to feel in each room when choosing the perfect vinyl flooring color. The Impact of Tones: From Light Grays to Rich, Dark Vinyl Flooring A subtle variation in tones can have a significant impact on your space. For example, a light gray floor can create a modern, airy feel, while a rich, dark floor can add depth and a luxurious atmosphere. Whether you go light or dark, ensure the tone complements the other elements in your room. Room by Room: Choosing the Perfect Vinyl Colour Each room in your home has its own unique needs and vibe, so it’s important to tailor your vinyl flooring choice accordingly. Living Room: Crafting a Welcoming and Relaxing Atmosphere For your living room, consider colors that are warm and inviting, such as light woods, soft grays, or beige. These shades work well with most furniture and decor and can help